Send Steps
Send steps trigger campaigns through Cheetah Digital when a customer reaches the send step in the Journey. There are three types of send steps: Send Email, Send SMS, and Send Notification, each designed to send the corresponding type of campaign.
Add a Send Step
From your Journey canvas:
-
Click + in the top left to open to left hand panel listing the various step types.
-
Select either Send Message, Send Notification, Send SMS.
-
Drag and drop to your desired spot in the Journey canvas.

Connections
The simple connector mechanism allows you to create complex workflows with clearly defined relationships between each step. When connecting elements, every step can have both inbound and outbound connections.
To create connections:
-
Hover over a step's edge to display an arrowhead.
-
Click and drag to the next step, and release to create a connector.
-
To label a connector, click it and add a name in the Edit Pane.
-
Use the Label Position slider to adjust label placement as needed.
Configuring the Send Step
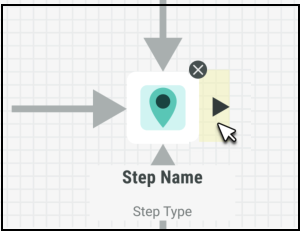
To configure this step, click on the icon in the canvas. This will open a panel on the left hand side of your screen with the associated settings where you can begin filling out each field accordingly.
Once complete, either click Save in the top right hand corner of your screen to save your changes and exit the Journey, or click Apply to save and continue updating the Journey.
Name
The system will automatically provide a default name to the Step, however we recommend updating this so that each Step’s name is clear and descriptive, and therefore easier to identify.
To change the name of your Start step, you can either:
-
Click on the default name directly on the canvas and type your preferred name
-
Enter a new name under Name from within the editing panel
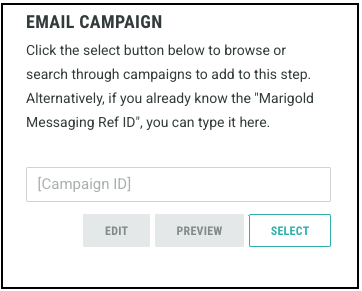
Campaign
Each Send Step must be linked to a Campaign in Cheetah Digital.You can select an existing Campaign or create a new one:
-
Create from within Journeys - will create a new Campaign applying all the correct settings for you, as a placeholder. You can further edit this Campaign in Cheetah Digital
-
Create from Cheetah Digital - make sure that you are using the correct settings for the Journey you intend to use it in.
Note: The Campaign must be running or published.
If you have already created your Campaign in Cheetah Digital:
-
Enter the Campaign ID, or click Select to open the list of Campaigns.

-
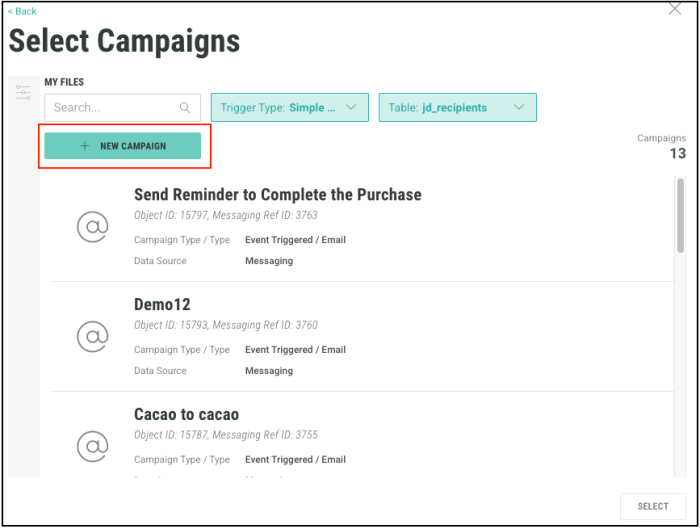
In the displayed popup window, select the Campaign that you want this step to be associated with. You can also use the search option to find your campaign. Alternatively, you can use the Trigger Type and Table to filter Campaigns.

-
Click on your preferred Campaign, then click Select.

You can create a place holder Campaign in Journeys if you do not have one set up in Cheetah Digital in advance:
-
In the Campaign field, click select to open the list of Campaigns.
-
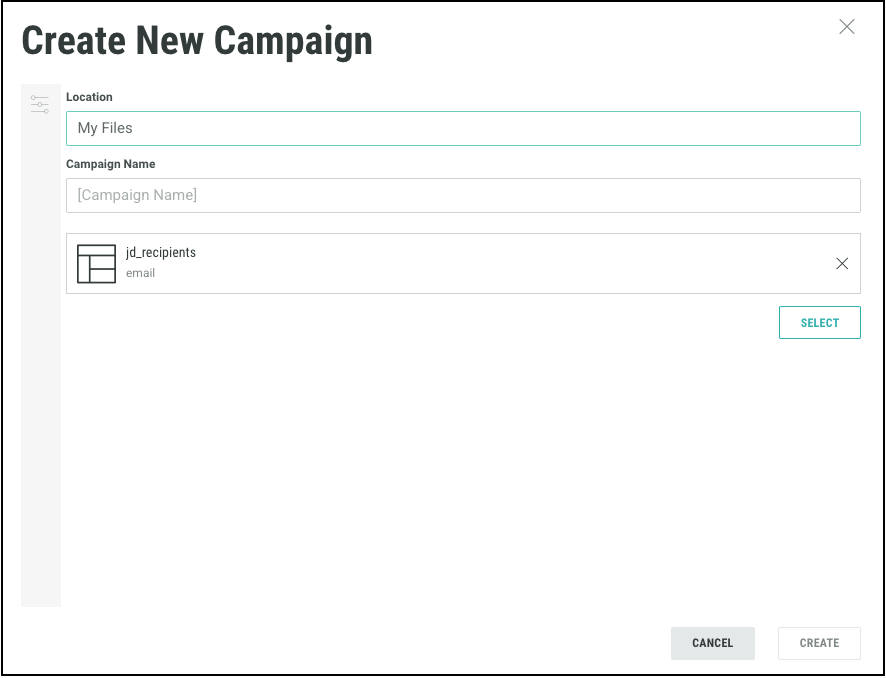
In the displayed popup window, click on New Campaign.
-
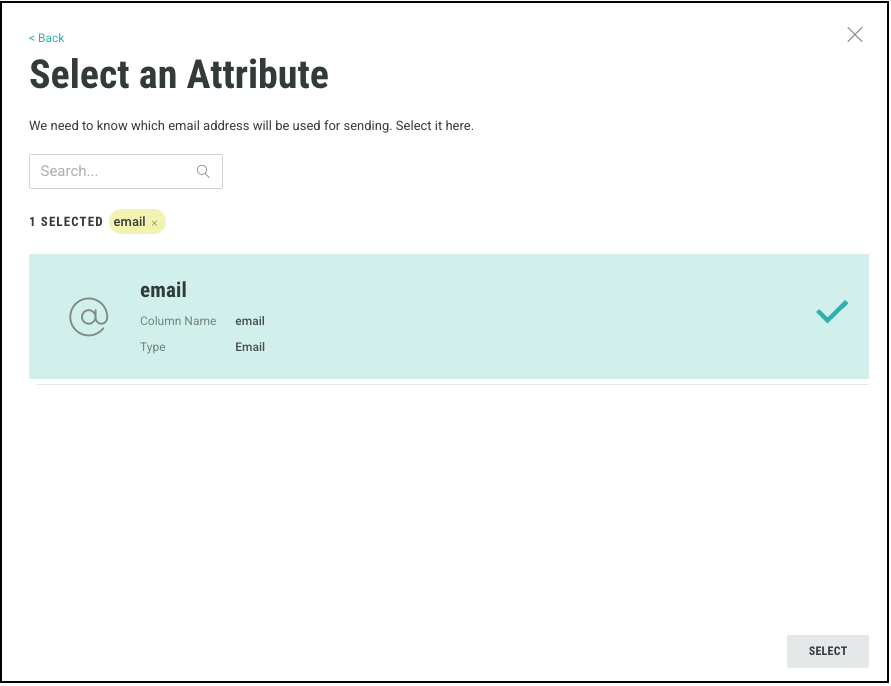
Select your folder location, give the Campaign a name, then click on select to choose the attributes from the database table.
Note: The initial table selected is defaulted to the data source that you selected in the Journey settings. For more information, refer Journey settings.

-
Depending on the Send step's Campaign channel (email, sms, push), the corresponding attribute is pre-selected for sending the Campaign.

-
Click Select and then Create. A place holder Campaign is created for you with the simple event trigger, to be used in your Journey
You can now edit this Campaign as needed in by clicking the Edit button in the Campaign field. This will open your Campaign in Cheetah Digital.

Campaign Personalization
Personalization settings determine how dynamic content is populated in your campaign. You can use either Simple Triggers or Advanced Triggers from your Journeys to trigger the Campaigns in Cheetah Digital.
-
Simple Event Triggers uses a straightforward API call to activate a campaign. With this trigger, you can only personalize Campaigns based on data from the main sending table (data source table).
-
Advanced Event Triggers uses the Advanced Event Trigger API to activate a Campaign. This option allows deeper personalization by combining details from the main sending table with real-time customer events from Journeys.
Note: You can add the Advanced event trigger to your Campaign , by clicking Add Event Triggers button in the Setup tab of the Campaign. For more information, refer Advanced event trigger.
Based on the trigger type configured for the Campaign, additional settings are available within the Journey step. If your Campaign has both simple and advance triggers, you can use this setting to specify which trigger type and the personalization options are to be used.
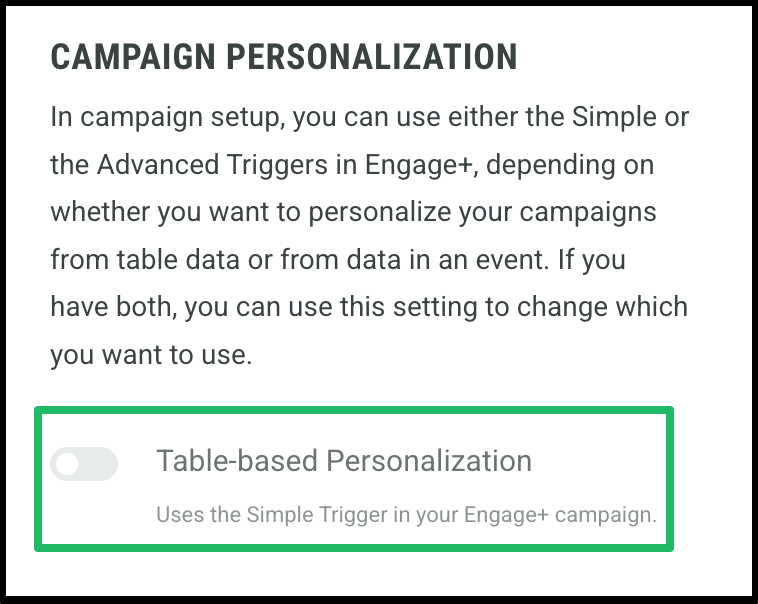
Using a Simple Trigger:
1. By default, the toggle is in the off position. With this option, you can only use data from your Cheetah Digital tables for personalization..
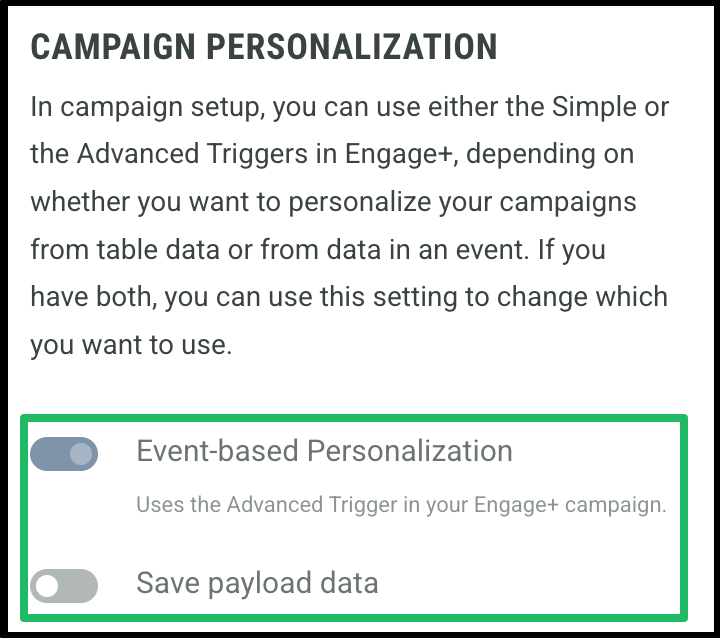
Using an Advanced Trigger:
1. Switch the toggle on to enable event-based personalization. With this option you can use real-time customer events from Journeys to personalize the Campaigns.
2. Once enabled, you will also have the ability to toggle on Save payload data. This will save the personalization data in Cheetah Digital for further use.
Note: If the campaign is configured with only a Simple Trigger or only an Advanced Trigger, the toggle will not be available. The system will automatically default to the trigger type defined in the campaign configuration.
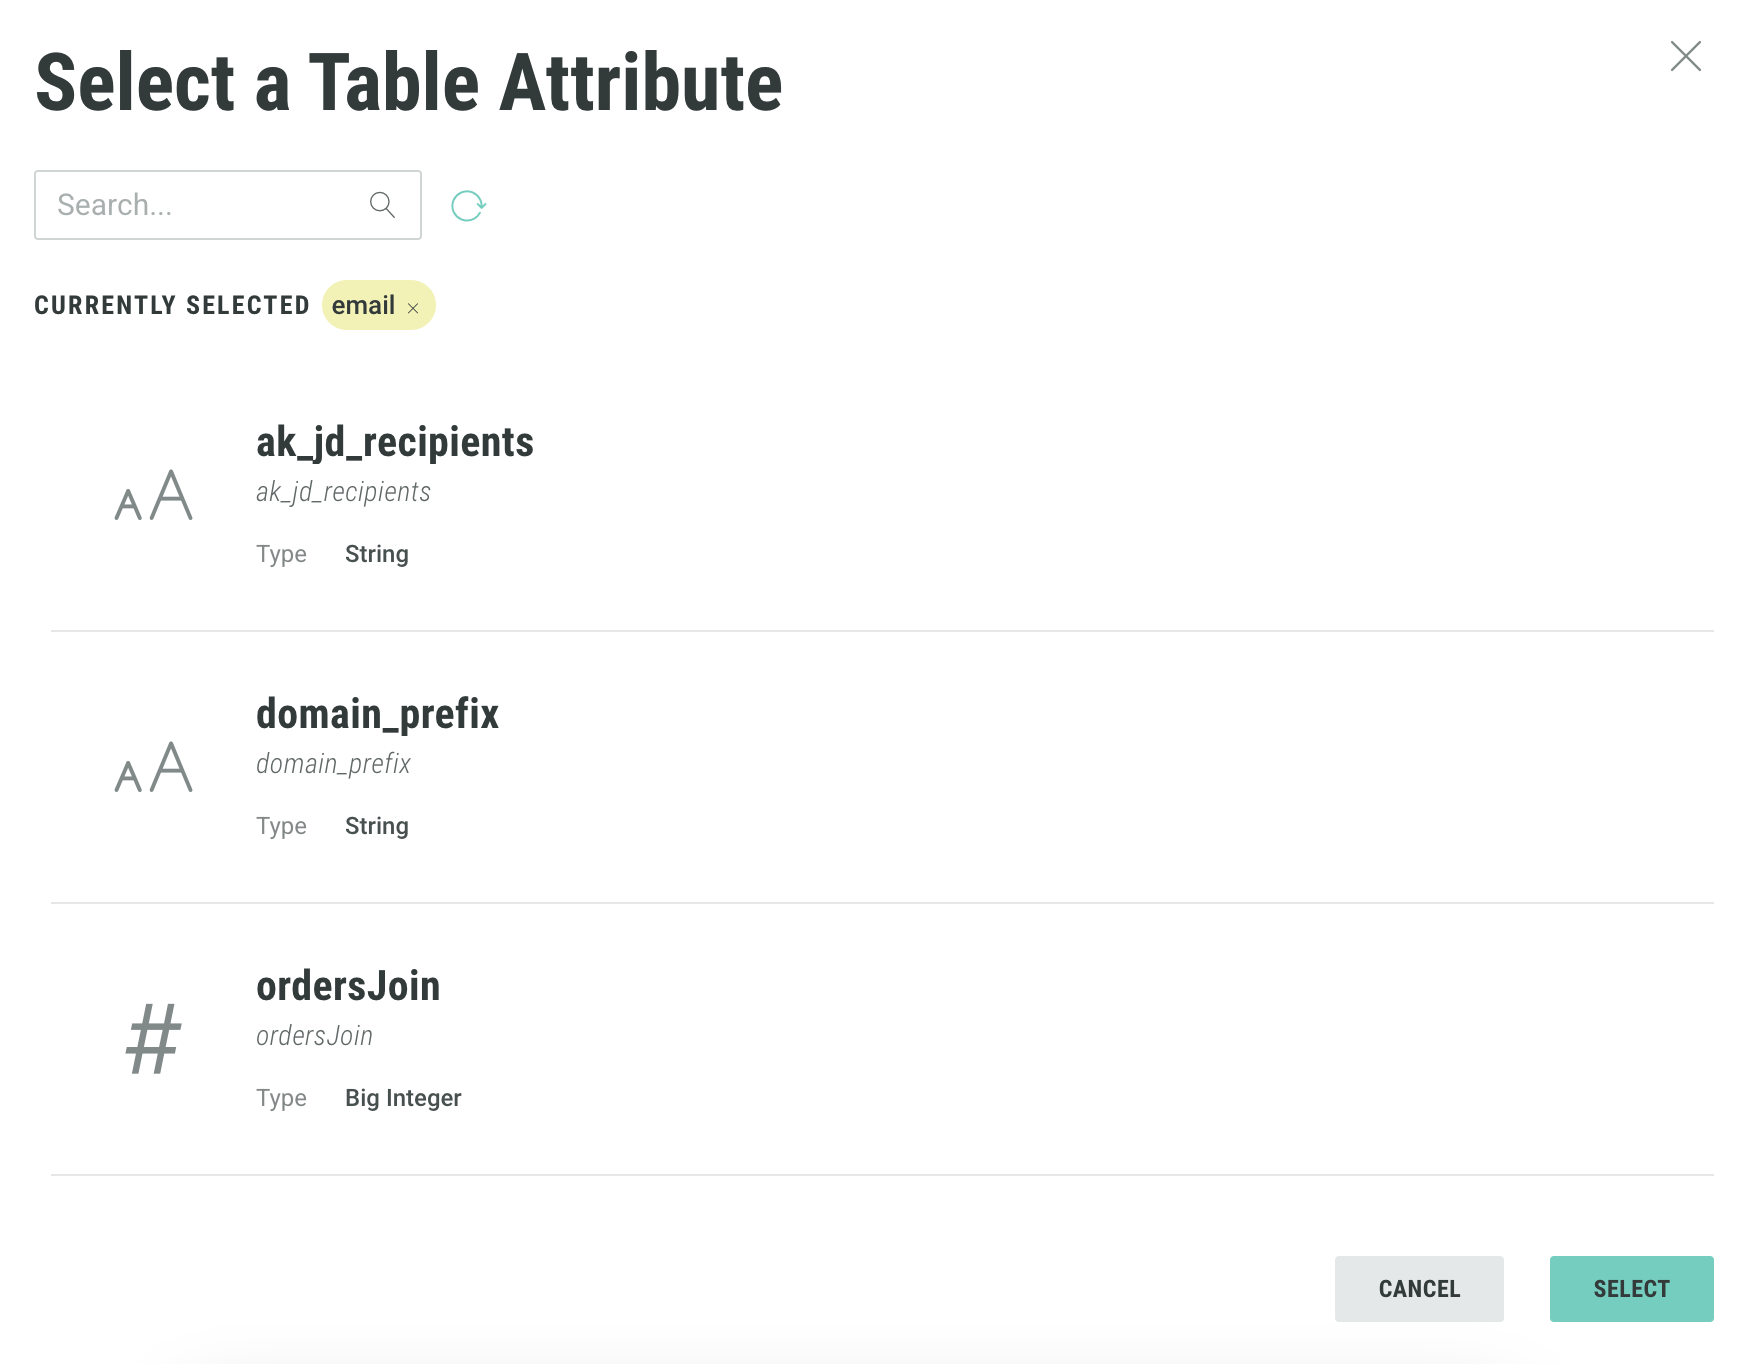
Table Overrides
By default, the recipient details (email addresses/ mobile numbers) are taken from the (email/ mobile number) column of the Data Source table. You can override this by specifying an alternative (email/ mobile number) column if needed. If your campaign uses event-based personalization with relational tables, you can override the default data source:
Note: This only applies if the campaign you selected has Event-based Personalization enabled.
1. Click select to bring up the Table Attribute window.
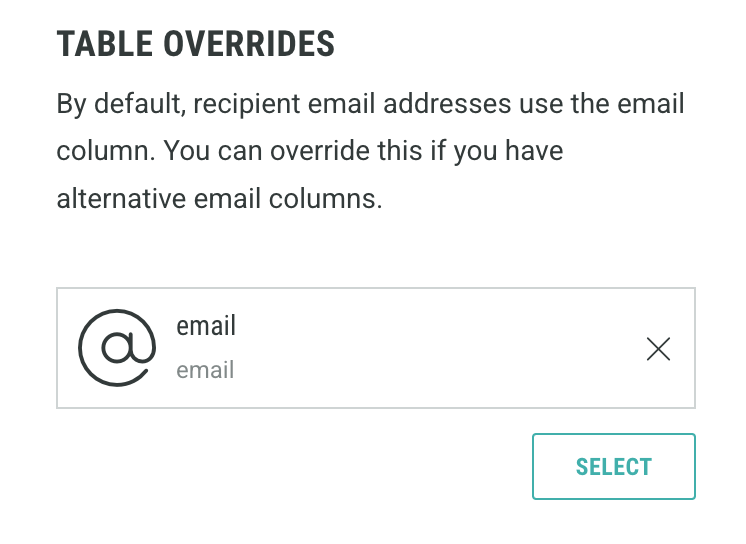
2. Find the table attribute that you would like to override your email column with.
3. Then click select.
Adding Notes
Use the notes section to clarify the rationale behind your choices or to highlight any notes for other marketers using the Journey.
